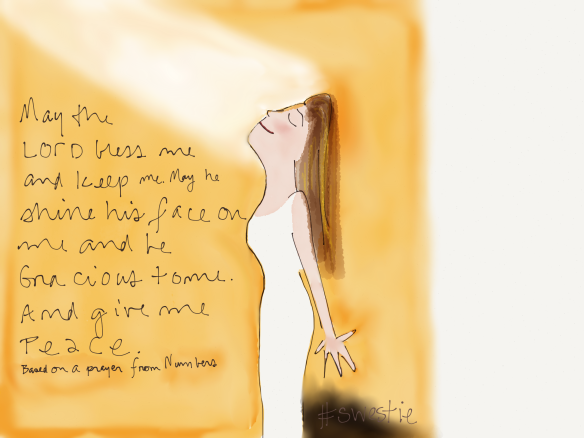
I am using a guide to help me read the Bible in one year. I’m one month in. #yayme I came across the Aaronic prayer in Numbers and knew that it would be the basis of my self-portrait for the day. (Follow me on Instagram to see each day’s post for #The100DayProject.)
Art, Margaritas, and Help-Me-Jesus-Hotwings
Image
Back when I was just a blushing bride living in Alexandria, Virginia, one of my favorite pastimes was taking classes in the Torpedo Factory. I took public transportation (bus + Metro) to work every day in DC and on days when I had my art classes, I would haul all of that stuff on my commute with me… paint box, large-format watercolor paper, backboard, portfolio, etc… with me on the bus… and on the train… and up and down the sidewalks. It was exhausting, but I felt so “city-fied” that it didn’t bother me a bit.
On those evenings, I usually got to Old Towne about an hour early which gave me some time to kill. My friend Michelle took classes there too, and we would meet at the Mexican joint across the street for salty, frothy margaritas and Help-Me-Jesus-Hotwings. After an hour of this, when I would go up to my figure painting class where so many people were notoriously tight and stiff, they would proclaim how loose and free my work was… they didn’t know my secret!
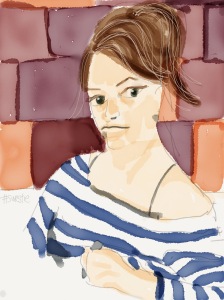
Anyway, this is a #TBT watercolor from that time. I was drawing and painting two-three times each week, and it definitely shows in this painting. Right now, I’m glad to be taking part in #The100DayProject, in which I am creating a self-portrait each day for 100 days (theoretically, of course!), because it is working my creative mind again… a lot. Most days, I find myself wanting to take the easy way out on my daily post… wanting to do a Swestie panel because it’s comfortable and easy, or a photo because it is quick. But I really need to be working on my drawing and painting. So when I have time, that’s what I work on. Hopefully, after 100 days, I will have made some progress.
You can see all of the posts I’ve made so far (18 days in) by following #100selfportraitsbyswestie on Instagram (my favorite) or Twitter. You can see things people everywhere are creating by following #The100DayProject. Will you join me in the challenge?
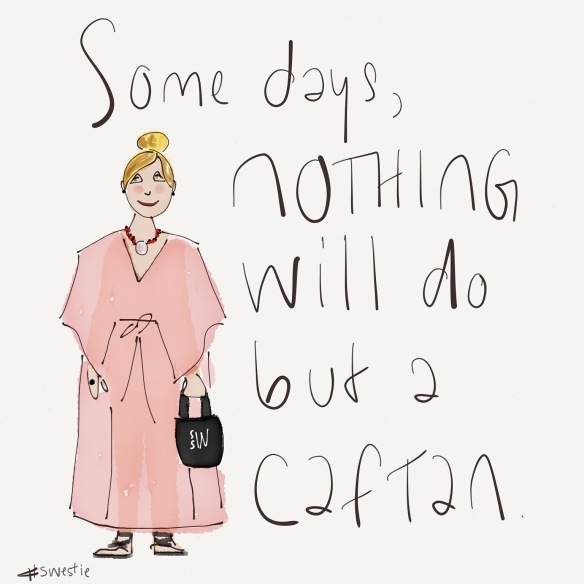
Some Days Nothing Will Do But a Caftan
Image
#The100DayProject #100SelfPortraitsBySwestie #53Paper #LLBean #boatandtote #monogram #ootd #summerheat #summer #caftan #swestie
Follow Swesite on social media! Links at http://www.swestie.com.
Best Homemade Pizza Crust EVAH
PIZZA. That great American staple that nearly everyone loves… bread… melty cheese… your favorite foods artfully scattered on top… what’s not to love?
When I was but a blushing bride waaaayyy back in the 1990s, my husband and I started making “homemade” pizzas using pre-made Boboli crusts with sauce that you squeezed out of a plastic packet. Because I never liked the way pre-shredded mozzarella melted (It has silica in it! That’s the stuff that comes in little envelopes in boxes with new shoes that says “DO NOT EAT”!), we at least grated our own cheese, but that was as far as it went for homemade pizza… simply a step above a frozen one.
However, in the last few years, I’ve been using my favorite 18 year-old wedding gift – a bread maker – to make my pizza crust. It’s been a process that could best be described as, well, experimental. Pizzas have ended up too soggy from the sauce or the toppings… so bready that the flavor of the toppings was completely lost… too dense to actually eat (all whole wheat – whole recipe)… you get the picture…
BUT (!), I do think I have perfected the process. I made a post on my personal Facebook page about it, and several people wanted the recipe, so I thought I’d share it here.
However, I will make one disclaimer: I don’t think it is as much the recipe that makes it good as the “method,” which I will also explain, so here goes.
“WHOLE WHEAT” PIZZA CRUST FOR BREAD MACHINE
I did NOT make up this recipe. I am not a recipe maker-upper, but I’m a GREAT recipe follower, intimidated by no lengthy list of instructions or ingredients! It came from a website called “Recipezaar,” and it is recipe #142788.
Ingredients:
- 1 c water + 2 TBS of water
- 2 TBS olive oil
- 1.5 c all-purpose flour
- 1.5 c whole wheat flour
- 1 tsp sugar
- 1 tsp salt
- The recipe calls for 2.5 tsp yeast, but I only use 2 tsp
Method
- I completely ignore the instructions and put the items in my bread machine in the order that I usually do as directed by my machine.
- When it is done, I pull out my well-loved pizza stone and give a generous dusting of flour.
- I CUT THE DOUGH IN HALF. Yes, I cut the dough in half because a whole recipe of this dough makes for a very heavy pizza that feels too bready.
- I use a roller and roll the dough out to cover the stone. I have tried tossing it like the hairy guys do at Mellow Mushroom… alas, I can not magically make a ball of dough into a beautiful, thin sheet like they do.
- Now, you have to make sure the crust isn’t sticking to the stone. If it is, just peel it up and get some more flour between it and the stone.
- When it’s not sticking, I fold the outside edge up to form the pizza bone (crust!) and poke holes with a fork all over the crust for ventilation.
- Bake it around 425 while I pull the toppings together. I take it out when it is really getting brown and solid. By solid, I mean not doughy or pliable anymore. This takes 10-15 minutes.
- Apply sauce and toppings. The toppings can’t be too watery or they’ll goo up the crust and make it soggy. (Ew.) For instance, if I’m using fresh tomatoes, I would pat them dry with a paper towel before I started.
- Put it back in the oven, but this time NOT on the stone, just the crust on the baking rack and bake until the cheese is melted and then enjoy! Not using the stone helps make it crispier. That’s what my sister told me, anyway.
SWESTIE’S HOMEMADE PIZZA SAUCE
Now, I did make this up, but calling it a “recipe” is a bit of a stretch.
Ingredients
- Half of a 28 oz. can of whole tomatoes… I should just get smaller cans… but that would just be too logical.
- enough olive oil to cover the bottom of a small frying pan
- garlic to taste
- just a few shakes of salt from the shaker
- just a lil sugar, like a tsp or so… this is optional, but it’s supposed to take the acidity out
- splash of red wine, if you’d like
- any other green herb you might enjoy or have on hand… basil and/or oregano are great options
Method
- Heat small frying pan on medium until it is good and hot. Do NOT impatiently heat it on high and try to turn it down. You KNOW that just never works.
- Put the garlic (either pressed or minced) in the small pan and stir it around to cook it.
- When it seems like it’s about to turn brown, add the tomatoes and juice from the can.
- Cut the tomatoes and stir them all around.
- Once it starts bubbling up, add the salt, sugar, wine and herbs. Let them mingle in for a few minutes. Then taste it and add anything else needed.
- When I’m satisfied with the taste, I give a few scoots with the immersion blender until all of the tomatoes are blended evenly… the immersion blender is a tool I thought was totally superfluous until I got one… now I use it all the time!
- Then, I do something I don’t usually do, which is turn it up on high for a few minutes to steam out some of the liquid so it wouldn’t be so watery that it would sog my crust.
- Et voila. It is finished.
- The last time I made this, it made enough for two pizzas… I put it in a baggie in the fridge with the other half of the crust, and I’m already anticipating how good it is going to be when I make it again next week!
Say some words of thanks for the food on the table and ENJOY with your favorite people. This is so easy it will become a go to in your rota.
PS – I didn’t know I was going to be posting this, so I didn’t take any cheesy step-by-step photos… not that I would anyway. The photo above is my well-loved copy of the recipe, printed on 5/7/2009. 🙂
#The100DayProject
Recently, I receive an email talking about a fun online challenge called The 100 Day Project. The concept is simple. Pick a thing to do 100 days in a row and document it on Instagram using #The100DayProject. Since I’ve recently been working to reconnect to my visual vocabulary, I thought I would do some sort of art challenge. I’ve always enjoyed doing self-portraits… not because I am a narcissist, but because, well, I’m always there for me. I’m approaching my thirteenth day and truly enjoying myself.
If you’re on Instagram, search #The100DayProject to see what people all over the world are doing. My handle is “Swestiesal” (“Swestie” was taken years ago by someone who has only ever made four posts… sheesh), and you can search #100selfportraitsbyswestie to see mine. Maybe you’ll even join me on the challenge. Let me know if you do so I can keep up with you.
The image above is a self-portrait I did with my favorite app 53Paper.
Evolution of a Blog
Back in the early early aughts when blogs were just becoming “a thing,” the country looked on while the best of the best got rich detailing such inanities as craft tutorials, home cooking, or even just the experience of being a parent. With every post that ountlined each excruciatingly tiny detail of the blogger’s latest DIY challenge or their newest recipe illustrated with ever-so-artful, step-by-step photography, readers flocked to their sites, leaving hundreds of comments. It only took a minute before savvy marketers saw the goldmine these targeted audiences provided, and the began paying the bloggers to advertise their products on the blogs. So then you had bloggers just quitting their jobs and living off income generated by the advertising run on their blogs about how how to make warm fuzzies out of vegetable-dyed, hand-spun alpaca wool that came from the alpaca they kept in their yard for just this purpose.
I thought to myself, “Hmm… I can do that!” So I tried my best to emulate blogs I admired. I documented silly projects; I wrote funny essays; and I gushed about my love of all things Twilight. But I just never really got any traction with followers and whatnot. In the meantime, I was learning how to use the Adobe Creative Suite (version 2!), and I started drawing little one panel comics and mixing them in with my posts. They were of a character I called “Swestie” and based on my deepest musings (ha!). After awhile, I realized that Swestie was me-est thing that was going on my blog, so I started posting them exclusively. But each one took a significant amount of time to render and post, so the number slowly decreased. Then one day, I updated my computer’s operating system, and my version of Creative Suite wouldn’t work any more, so Swestie died an abrupt death.
Eventually, I found a fun iPad app called 53Paper. I’ve played with it off and on, and I finally feel like I am developing a style with it. Yay me! And I’ve also been trying to do some more painting and drawing – what I REALLY love to do… and… well… what I’m trying to say is this: having a blog launched me on a creative path I could never have predicted. Even if I haven’t found financial success so far, I discovered my voice. And my voice is visual. And I am so grateful for that!
How grateful am I? Grateful enough to start posting again, mainly about my creative pursuits. I’ve been participating in the #the100DayProject and really enjoying what I’m doing. So, I’m going to share some of those things with you, and perhaps some other random stuff too… maybe even a step-by-step recipe with photos! Ha!
If you are checking these posts out, I hope you will enjoy yourself. I hope you will feel something. And I hope it might inspire you to pick up where you left off with your creative pursuits too.
Like, totally radical, dude.
Yackity Yack
Rest strong
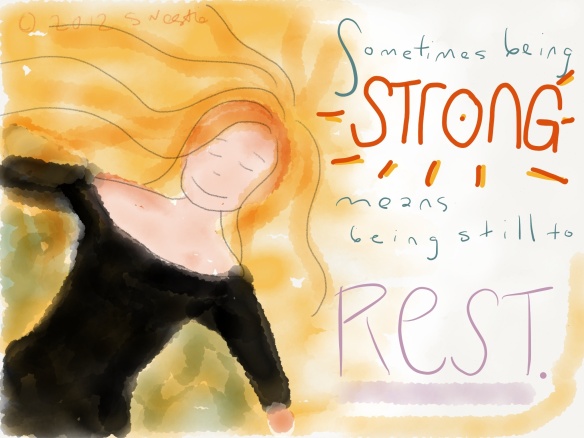
Sometimes being strong means being still to rest.


